Monday, August 26, 2013

Weekly Layouts

Wahoo!  I finally got some cropping time this past Saturday with a dear friend.  We spent 10 hours together at our LSS.  I finished 13 layouts.  Well almost.  Several of them need a tweak or two.  I thought I'd share some of them here over the next few weeks.

Since my cropping time is suddenly non-existent (hello, new grandson), it is more important than ever than I use the time wisely.  I chose to use sketches on all but two of the layouts, and on that one I used a 12 x 12 die cut overlay, that I'll share later.

I think it's important to use WHATEVER tools you have available to get the job done.  I really do love sketches.  I love recipes, but I also love that I can venture off and add/subtract or switch it up if I need.

(Whenever I share photos on ye 'ole blog, just click on them to see them bigger.)

First up is a layout from the Well Heeled breast cancer luncheon I attended last year.  What a hoot that turned out to be!  I actually walked the catwalk, modeled my shoes, and won...er, the shoes did.  They shoes stole the show, actually.
I added the program to the area where the sketch called for journaling.  Easy.  I also included my name tag with some cute washi tape.  The big journal box was computer generated and cut with a Spellbinders Label One die.
 
Glitter paper just doesn't photograph well, but it really sparkles.  The title and the pink ribbon accents were cut with my Silhouette Cameo.  Yep, cut through the glitter paper just like butter!  Of course, I needed to add the rhinestones to the shoe!  And, I added one of the accents directly to the top of a photo!
Here's the Let's Scrap inspiration.
4-10-13 Sketch
The second layout is April's Baby shower and it will go into Gavin's Project Life book.  I only used the left side of the sketch.  Instead of just one large photo, I grouped six photos together in PSE using a template and printed them as one large photo.
I just have to give you a close up shot of my title!  It was a baby t-shirt shape from the Silhouette store.  I added the Baby Shower text to the top.  I embellished the finished shirt with the blue footprint washi tape and a gingham bow.
 
It was based on this Let's Scrap sketch:
7-31-13 Sketch
And, finally, Baby Love.  These are the pictures from the "gender reveal" photoshoot I had with the kids just after we found out that we were indeed having a boy.
Again, the embellishments were cut on my Silhouette Cameo.  I added the blue sparkly accents with a Gelly Roll pen.  And, yes, all of the picture props and ideas were mine.  I tweaked some of the photos to black and white, and left only the props blue for emphasis.
Based on this Let's Scrap sketch:  I loved this sketch.  So super simple and such clean, straight lines.  I like those!
8-14-13 Sketch
Well, there you have it...five finished pages.  Done & documented.

Friday, August 23, 2013

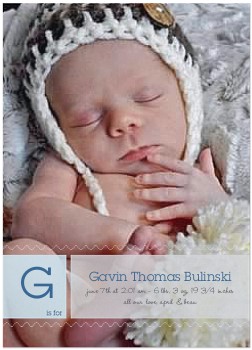
Official Birth Announcement

Better late than never, right?

It only took 8 weeks for us to get our ducks in a row and get some official announcements out in the mail to family and friends.

Truth is...there were just so darn many choices out there (and they can be a bit pricey!).  Oh, that and the fact that I had exactly 118 really cute, newborn photos to choose from!  (Gosh, he's gonna hate his shutter-bug Grandma.)

We are really enjoying our new little man.  He is changing daily and putting on some weight in a hurry.  Truth is...he doesn't look a day over 11 weeks!
Front
 
back
 
He's so darn sweet.  'Specially when he's sleeping...
 

Wednesday, August 21, 2013

Nursery Decor

I thought I'd share some of Gavin's "Grandma-made" nursery décor.  'Cause for sure, he needs his name as the above-the-crib-nursery centerpiece.  As a reminder, his nursery/bedding is a jungle-theme.  (You might also remember seeing these same letter as shower décor doing double-duty.)

I'm not gonna lie, these took me a few days to finish.  I bought unfinished, light-weight letters, because after all, they do hang above the crib.  This project would have been so much easier & faster if I had splurged on white wooden letters, but where would the fun be in that?  I decoupaged them and WOW! did they turn out great.


How To Make Them:
  • Paint the edges of the letters any color you like.  I spray-painted mine white.  I also painted the backs for a more finished look. 
  • Place letter backwards on back side of paper and trace outline.
  • Cut letter shape out of paper.
  • Apply thin coat of Mod Podge to letter and align paper letter on top, smoothing down. Let dry.
  • If there is excess paper hanging off the edges of letter, either trim with scalpel (or scissors) or you can smooth edges down with a fine grit sandpaper.
  • Apply at least two thin coats of Mod Podge, allowing each one to dry completely before applying the next. Make sure to seal the edges. I brushed the coats in two opposite directions to get a "cross-hatched" finish.
  • Hot glue animal accents.
  • Add decorative ribbon for hanging.  Tie bow/knot at top.
What You Need:
  • Craft Paper Letters (I got mine @ JoAnn's)
  • Patterned Paper (I downloaded 5 digital animal paper(s) and printed on the colored printer 11" x 17")
  • Mod Podge
  • Tools:  Scalpel, Scissors, Pencil, stapler
  • Foam Brush
  • Animal décor (also from JoAnn's)
  • Glue gun
  • Gross grain ribbon

One more last look:
My dear daughter, April, and I had such a fun time with the nursery décor.  I give it about 7 months.  Then it will become a disaster zone.

    Wednesday, July 31, 2013

    End of a Titan

    Goodbye

    Creative Memories, was the original scrapbook company created by a very passionate woman (genius) that just wanted to get her photographs out of a shoebox. She single-handedly can be credited with creating a worldwide $1,000,000,000 industry!
     
    I am so sad to see CM close its doors and discontinue traditional scrapbooking products.  The company filed bankruptcy this month on what would have been its 26th birthday. The company is poised to re-open on November 1, but what the product line will be is still a secret.  It will be vastly different.

    Creative Memories changed my life in many ways, as I have been a customer for 14 years and a consultant for 12.  Beyond the love of the products, I found a creative outlet, a keen eye for photography, passion for a hobby that runs deep (and scares even me sometimes), and hours and hours of girl time spent "cropping" with my friends/customers.  We liken these get togethers as quilting bees of our generation.  We've swapped countless stories, shared amazing life memories, wept, laughed and preserved thousands of photographs -- in the very scrapbooks the company invented.  My count:  46

    Today is the last day to order albums, pages, and page protectors @ www.creativememories.com

    R.I.P. Creative Memories. 
    It was a great ride. 
    Scrapbook enthusiasts worldwide will never forget the joy your products brought to their lives. 

    I thank you and my children (and their children will) thank you.  And so on and so on.

    Wednesday, July 10, 2013

    Gavin's Baby Book

    Oh, the pictures...they are a piling up!

    I'm still undecided as to the format of Gavin's baby book.  Will it be a traditional scrapbook?  Will it be in the Project Life format?  Will the pages be filed in our chronological family albums?  Will it be for him?  For April?  Or, for Grandma?  Gosh, I can't decide!

    I did get some cropping time before the 4th of July holiday, and got the title page done.  These pics are from his first photo session at the hospital.  I loved them both!

    I used this sketch pulled from the piles on my desk my "inspiration" folder.  It was designed by Diana Fisher and originally published April 2012 @ Scrapbook Circle.   Although it called for different photo orientations other than what I had to work with, I think it turned out okay.
    The products are from the new Fancy Pants line called Park Bench. When I saw that blue & yellow measuring tape paper, I fell in love.  I knew it would be perfect for our new baby boy.  The rest of the line is just so darn precious.  Love it!

    Background cardstock:  American Crafts Nickel
    First Photo sticker:  Bella Blvd. We're Expecting Baby's First Miniatures
    Twine:  Stampin' Up Island Indigo
    Corrugated Letter Stickers:  American Crafts Vanilla Thickers
    Confession time.  I'm not really a good layer-er (is that a word?); but based on the sketch, I just kept going, cutting, and placing.  A matched set of patterned papers makes it a tiny bit easier.

    Care to weigh in on what kind of baby book I should be making?  What'cha think?

    Wednesday, July 3, 2013

    A (like)New Chest of Drawers

    Since baby Gavin is here and we are adjusting to our new titles as grandparents of a three-week-old, life is certainly not settling down.  Not even a little bit.  I'm never home.  Most days, after work, you can find me helping my daughter hanging out with Gavin.  Gosh, is he ever sweet!

    If I do have a free afternoon, I am trying to catch up on laundry, work in the yard, or clean my dirty house.  Seems a new baby puts EVERYTHING else on the back burner.

    I did have some free time this past weekend, and attempted to at least organize my photos for the last three months.  Including the baby shower, I've taken over 2,000 photos (which includes our get-it-in-before-the-baby-comes Alaska cruise).  Hopefully, I'll get to share some stories and photos of that soon.

    For this particular post, however, I wanted to share a pre-Gavin project. This is my first attempt at a DIY furniture makeover.

    I've been reading how-to blogs, pinning images, and studying product reviews for months years.  I felt I had enough knowledge to attempt a small piece of furniture.  Hmmm, maybe I shoulda started with a table or a footstool (something really small).

    This chest-of-drawers is a wee bit special.  It was part of the matching nursery set I had when I became a mom 30 years ago.  My daughter used it for two years, and then my son used it for the next 24, and then gave it back to my daughter when he moved!  It is a good solid piece of maple furniture.

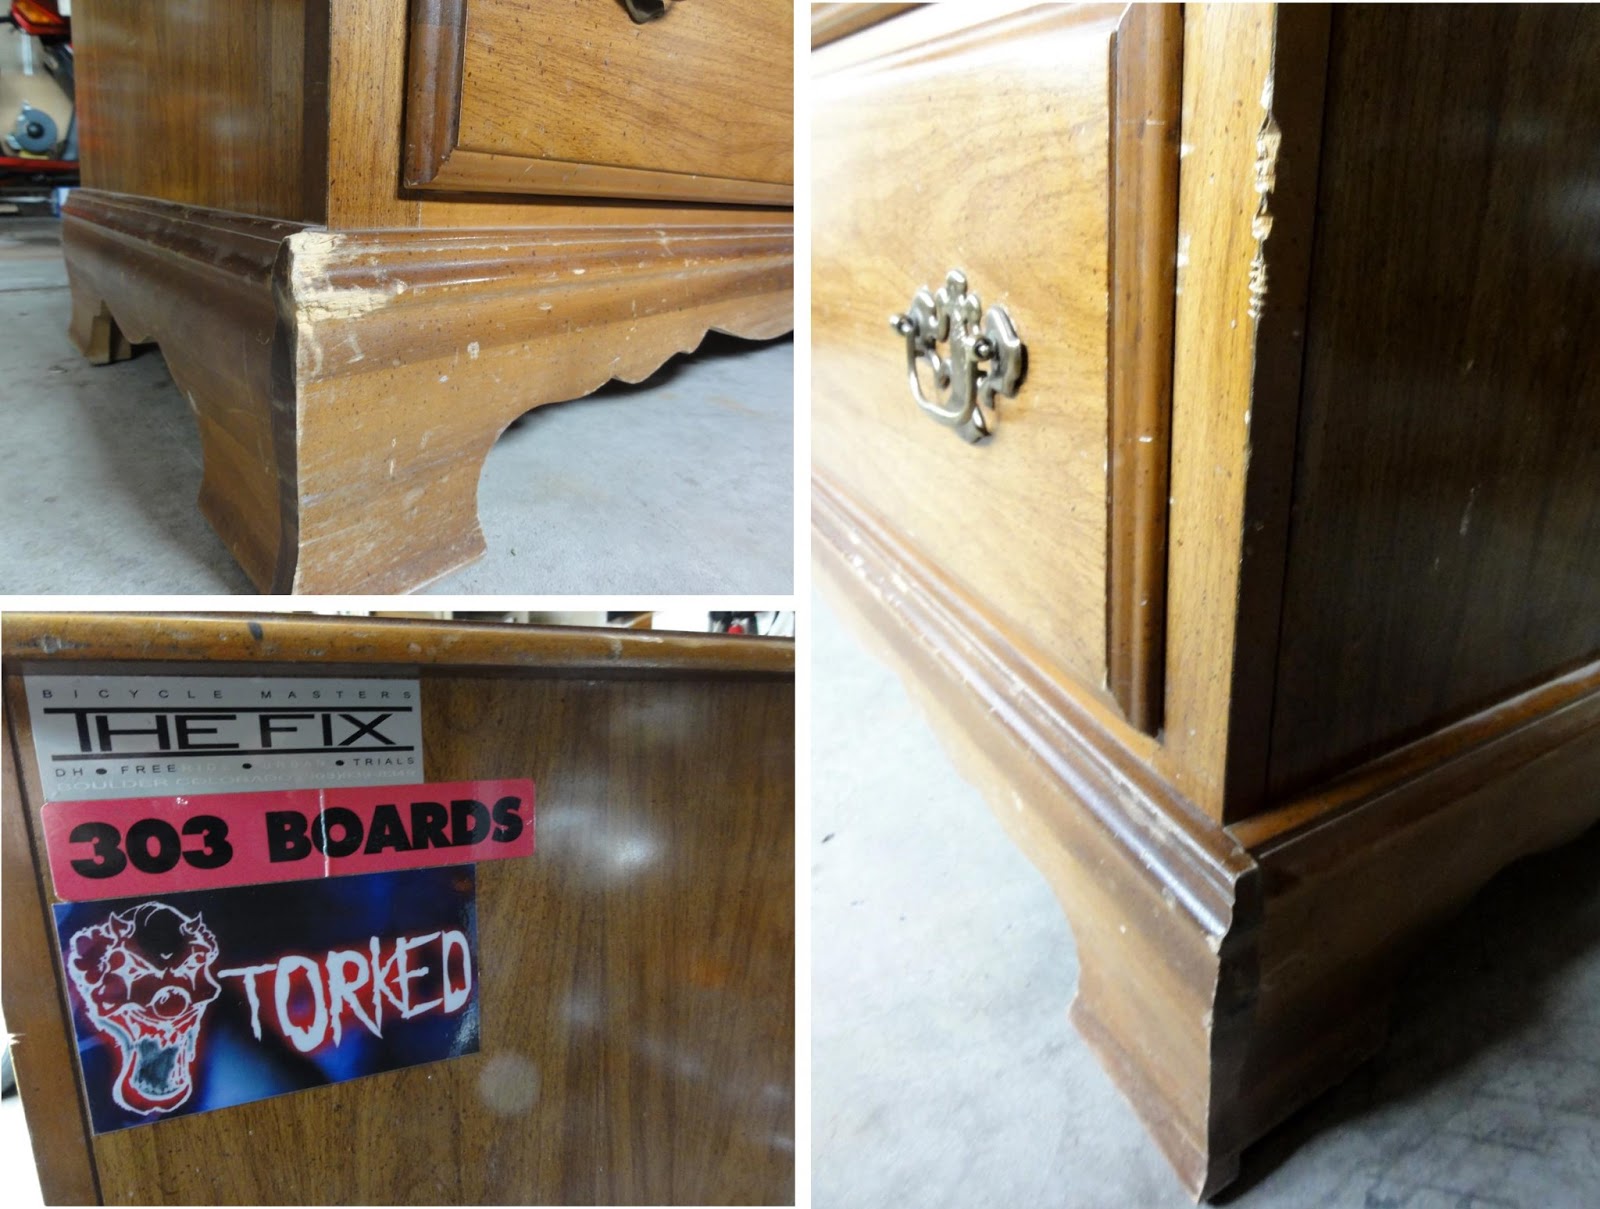
    Here's the before:

    ...and...ta da!  Here is the after:
     
    And, I should mention, this dresser had some real challenges for a newbie.

    I really had no idea what I was getting into.  Bloggers make it look so easy.  It is not.

    I went to get the supplies.  Everyone said to get a good brush.  Boy, are they expensive.  I settled on the "second to the best."  I wish I had splurged.

    First, I removed all of the old hardware and some stickers my teenage son thought would look cool.  On furniture?  Are you kidding me?

    I sanded, filled all the holes and patched all the dents, and sanded some more.
     
    I used a spray primer. 

    Then, I had a brilliant idea!  Gavin's changing table has a bead board front.  Hmmm.  Sure would be great if the dresser matched!  Thanks to the marvelous invention of paintable bead board wallpaper, it does now!  I simply added it to both sides of the dresser.  Even unpainted, it made a huge difference. 

    I painted the entire dresser with two coats of white latex paint.  Did you know that you actually have to mix color to get white paint; and there are many, many shades of white paint to chose from?  Neither did I.

    The biggest problem I had was with the top.  I simply could not get the top painted in one fell swoop before it began to dry.  My perfectionistic self hated seeing brush strokes.  I sanded and repainted the top of the dresser three times!  Working much faster each time.

    When I went to get new hardware, it was like a candy store!  So many choices.  I had a hard time choosing, but settled on the white knobs.  Each drawer has a different color.  I measured where I wanted the knobs and used painters tape to "mark the spot."
    
    Just one picture of me actually doing the work...
    the rest are just not pretty.
    And, yes I can use power tools.
    What do I think about refinishing furniture? 
    1. It's definitely a summer project.  I hated hauling the furniture in/out of the house to the garage when temperatures were suitable for painting.
    2. It's a huge commitment (time, energy and $$).
    3. It can always be re-sanded and you can start over!
    4. Yes.  I'll try it again.
    Here's Gavin's new dresser:

    I'm glad it's finished.  I give myself a B+.  Gosh, I hope it will stand up to toddler destruction....

    Wednesday, June 12, 2013

    I'm a Grandma!

    For those of you who don't already know, just five days ago at exactly 2:01 a.m., my amazing daughter, April, gave birth to our precious grandson, Gavin Thomas.
    Currently, all is right with the world, and I am catching up on a missing night of sleep, but...oh...my...gosh...are we happy!
    Last week was a blur.  I've got lots of stories to go with the birth of the most perfect little boy in the whole world; but for now, I just want to revel in the miracle of tiny baby feet and hands, the sweet nape of his neck, long eyelashes, and the deliciousness of his new baby smell.  Intoxicating!  Can't get enough!  Oh...and hair!  He HAS hair!

    I am so proud of April and her fiancé, Beau.  As a first time mother, things did not go smooth for her but she kept working like a trooper (and thank goodness for a "vacuum assist".  Is that too much information?).   Beau was so great with April, very accommodating and a strong coach when she was struggling. Watching your daughter give birth, is definitely not for everybody, but what a blessing to bear witness to your grandson's first breath; and because Beau is a tad bit on the squeamish side, I got to cut the cord!
    
    The first "official" photo.
    Notice the blanket?  Yep, it's the one I made!
    I'll admit, I do think he is on the tiny side measuring in at just 6 lbs. 3 oz., but rather long @ 19.75".  Being nine days early, his arrival had us all in a bit of a twitter, lots of last minute things to do, and I wasn't quite ready...as I could just kick myself for waiting so long to shoot the final pregnancy pictures.  I'm trying to get over the lost photo op.  But...now I've got a real, live subject!
    I take this Grandma thing very seriously.  It's my job to cuddle, rock, spoil, love and adore this little guy. 

    Welcome to the family Gavin
    (it's a cra-zee one)!