My "secret" recipient loves snowmen. So, I wanted to design a project around that fat, happy, round white guy. I also knew I wanted to make coasters, so I designed a 8" x 12" scrapbook page! I adhered the title and the stickers just like I would for my scrapbook (I might mention that an 8" x 8" scrapbook page would fit perfectly over four coasters).
Here's what you need for the coasters:
- Mod Podge
- Paper/design/scrapbook page (your stash is waiting to be busted)
- 4" x 4" square tiles (any will do...look for the ones on clearance...I got grey slate tiles @ Home Depot for $.30/ea)
- Felt bumpers (optional, but you will want to protect the furniture!)
- Clear Acrylic spray (added protection for sweaty, drippy drink glasses)
 |
| Paper & Stickers: Echo Park Winter Wishes Title: Cut with my Silhouette |
 |
| Isn't that a nice crafting dish for Mod Podge? Red Solo Cup...I fill you up. |
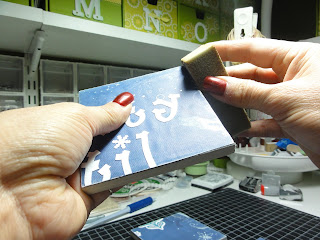
When the Mod Podge was dry, I distressed the edges with a sanding block just a bit.
I chose to "seal" mine with a clear spray sealer.
Finally, I added felt "bumper" pads to the bottom of the tiles -- no scratched furniture here.
There you have it. The coasters turned out adorable. These are perfect for a holiday party, kinda like a puzzle - interactive and functional! What d'ya think? Will my "secret" recipient like 'em?
Imagine how cute these would be with a full-size, family portrait!


No comments:
Post a Comment